
How to Paint Kitchen Cabinets Like A Pro: DIY Guide
This post is all about how to paint kitchen cabinets like a pro.
Are your kitchen cabinets out-of-date, but you don’t have the budget to pay a contractor? It’s actually quite a doable project to DIY, even if you’re just a beginner! In this blog post, you’ll learn how to paint cabinets yourself and save potentially thousands of dollars!
Keep reading to learn how to paint kitchen cabinets like a pro!
Step-by-Step Guide to Painting Kitchen Cabinets
When my boyfriend and I moved into our new home, one of the first projects we decided to take on was re-doing the kitchen cabinets. Our cabinets were outdated and very poorly done (the vinyl covering was literally peeling off!).
We received a few quotes to get the cabinets professionally done that ranged between $2,000-$4,000, which was way outside our budget – so we decided to take on the project ourselves.
We quite literally saved thousands of dollars by doing it ourselves! The whole project, including materials, cost around $350 (plus lots of labour time, of course). Even though we had no idea how to paint cabinets, it was definitely worth it to have the amazing end result and save thousands too. Here’s a how-to guide to painting kitchen cabinets for beginners:
1. Plan & Prepare Your Materials
Before starting any DIY project, it’s important to put together your project plan and gather your materials. For your plan, think about:
- Where are you going to paint the cabinets? We don’t have a garage in our home, so we made a plan to bring these cabinets to my parent’s garage to paint.
- How much time do you need to set aside for this project? Keep in mind that there’s several hours of drying time needed between coats, so it’s unlikely you’d be able to finish this project in one day.
You also need to gather your materials. The last thing you want to do when you’re in the middle of a DIY is run to the store for supplies. So, make sure you gather everything you need in advance! Here’s a checklist of the materials that will help you conquer this project successfully:
- Primer & Paint – ask your local paint store for recommendations based on the surface you’re painting, and the desired look
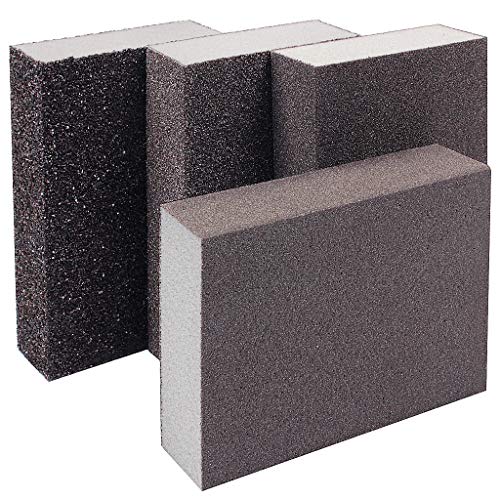
- Sanding blocks
- Paint brushes
- Paint sprayer
- Painter’s pyramid stands
- Painting tent
2. Remove Cabinets & Hardware

Once you have all your materials gathered, it’s time to dismantle the cabinet doors and drawers. It’s way easier to complete the rest of the steps when the doors and drawers are removed from the cabinets.
Unscrew all your cabinet doors and drawers from the hinges, and take off the hardware too. Don’t forget to store the handles, screws, etc. somewhere so you don’t lose them. We put them all in a Ziploc baggie to keep all loose ends together.
TIP: If you have tons of cabinet drawers and doors that are similar sizes, number them with tape or sticky notes to keep track of where each goes. Put one number on the door/drawer, and the other on the space where it goes. This will streamline your process when you’re re-assembling at the end.
3. Remove Vinyl Cabinet Covering

You can skip this step if your kitchen cabinet doesn’t have a vinyl covering, but ours did! So, we needed to peel off the cover one piece at a time. This was super time consuming, but obviously necessary.
4. Remove Grease and Grime
Kitchen cabinets tend to get easily covered in grease and other residue. It’s very important to remove this before any paint goes on the cabinets! We used an old rag and mineral spirits to make sure all the grease and grime were completely removed.
5. Sand Cabinets
Before you jump into painting and priming, you need to sand. This is an essential step that you don’t want to skip! Sanding scuffs up the surface, which makes it easier for primer and paint to stick. You can either do this manually (we used sanding blocks), or with an orbital sander.

After sanding, wipe down your cabinets with a damp cloth or rag to remove any residue.
6. Prime Cabinets
Next, it’s time to prime! Make sure you have the right type of primer for your surface. Our local paint store was super helpful and answered all our questions to find the best option.
When you’re in the stage of priming, the pyramid stands are super helpful to raise cabinets off the ground. This allows you to easily reach around the edges of your cabinets! If you don’t want to spend money on pyramid stands, a great free option is to use jars or cans that you have laying around your home as stands.

Before we started this DIY, I asked my friend (who had just painted her cabinets) for advice and she said she really regretted not using a paint sprayer. While you can paint with regular paint brushes and rollers, a paint sprayer will make the process of painting cabinets SO much easier, and faster.
Also, cabinets are a very visible focal point of your kitchen so you don’t want streaky, poorly painted cabinets. That can be a dead giveaway that it wasn’t done by a professional. If you’re wondering how to get a smooth finish when painting kitchen cabinets- I’d definitely say the paint sprayer is your best bet. Investing in a paint sprayer is also a great idea if you plan to do other home projects in the future. Here’s the paint sprayer we used:

If you do use a paint sprayer, it may be worthwhile to get a painting tent to avoid any accidental paint transfer to wall or floors! Of course, you could always use tarps or old sheets as a lower-cost option.

7. Sand & Paint Coat #1

Next, it’s time to sand (after the prime has tried, of course) and then get started on your first coat of paint.
8. Sand & Paint Coat #2

After the first coat of paint has dried, you’ll want to lightly sand (yes, again!) for paint coat #2.
If your finish is looking smooth after just one coat, you don’t have to do a second coat. But, I opted for 2 coats of my paint and I love how it turned out.
9. Re-Install Cabinet Doors and Drawers
The hardest part of your project is now done! It’s time to re-install your cabinets and enjoy the finished product. We opted to use the same hardware, so we screwed each of the handles back on and put each door and drawer back in its place.
Check out this HUGE transformation! We love the way it turned out.

This post was all about how to paint kitchen cabinets like a pro.
Other posts you’ll love:


You May Also Like

Lululemon Must Haves | 6 Lululemon Items That Are Worth It

5 Important Benefits of Taking Time Off From Work
